
How to Pair Android Wear Watches to New Phones without Factory Resetting
Pair Android Wear to New/Same Phone Without Wiping
First, you will need to download the ADB tools. I personally use the official binaries from Google. Next, you will need to enable ADB debugging on your smartwatch (both wired or over WiFi debugging are fine, though I find WiFi more convenient). This is enabled through Developer options on your smartwatch, which you will also need to enable. To do this, simply go to Settings → system → about on your watch and tap the field labeled “Build number” until you see a toast message stating “you are now a developer”.
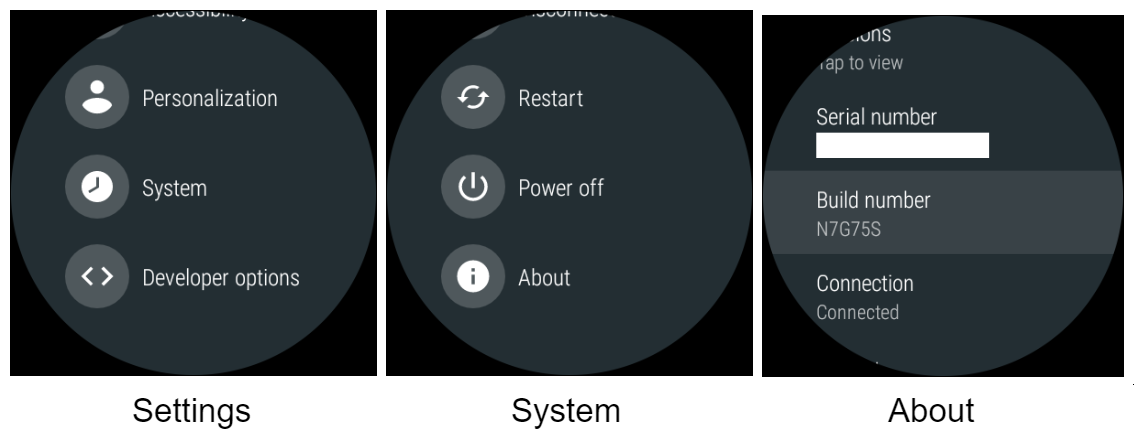
Enabling ADB debugging
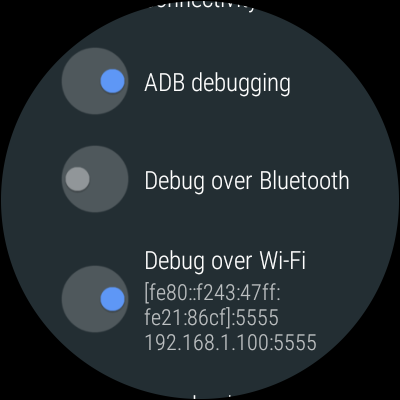
Open Developer options and enable “ADB debugging” or “Debug over wifi” if you wish to do it wirelessly. The process to sync Android Wear to your smartphone will work fine both ways, but they require slightly different commands.
Initial setup to sync Android Wear will require a different command whether you are doing it over WiFi or not. Please open adb tools, either by searching adb in your Windows search bar or navigating to the folder containing adb, holding shift then right clicking and selecting “open command window here”. Then enter the below commands.
Over WiFi
In my case, I would type:
adb connect 192.168.1.100:5555To connect to my Android Wear watch. The IP address you need to enter is located under “Debug over WiFi”, as shown in the screenshot above. Accept the prompt on the watch allowing the computer to debug. If successful, it will simply go back to the command prompt where you can type. There is now text output.
Wired
Substantially easier in commands, simply connect your device to your computer and type:
adb devicesIf your device shows up, you’re fine. Make sure you accepted the prompt on your watch to allow it to debug.
Sending the Commands
To continue on, first disable Bluetooth on your phone and then on your computer type:
adb shell “pm clear com.google.android.gms && reboot”Your watch will reboot, but no Android Wear factory reset will occur. When it boots back up it should no longer show a crossed out cloud icon indicating that it can’t connect to your phone. You will now want to install the Android Wear app on your phone (if you don’t already have it), but don’t enable Bluetooth yet.
Next, connect to the smartwatch via ADB again with the exact same steps as before. This time however, the command you want to run is:
adb shell “am start -a android.bluetooth.adapter.action.REQUEST_DISCOVERABLE”And then on your watch allow it to be discoverable to other devices so you can sync Android Wear with the smartphone. You may now connect to Android Wear from your smartphone by opening the Wear app, enable Bluetooth, and search for devices. Your Android Watch should show up and your phone will sync with it. If the app hangs on “Checking for updates”, simply restart the app and it should begin to connect to Android Wear.
Explanation
The simple explanation as to why this works is that all smartphone-smartwatch pairing data is contained in Google Play Services. This data is phone-specific as the keys are stored in the Play Services data located on the smartwatch. This is the reason why you can’t simply Titanium Backup the Android Wear application from your smartphone, because the keys you need are stored on the smartwatch. When you try to pair a new phone (or have installed a new custom ROM and the watch thinks it’s a new phone), the keys are normally wiped through an Android Wear factory reset.
The only way to get around this is to instead wipe the key data which allows you to pair Android Wear with a new device without factory resetting as the keys that pair it to your phone are also cleared. We then request the smartwatch’s Bluetooth to be made discoverable via an intent sent through adb, which creates the prompt you see that needs to be accepted. This means your phone can now find your watch and then create new pairing keys with the device.

Leave a Reply
You must be logged in to post a comment.